a {mini} fall tour.

Decorating for holidays, and decorating just because, looks a little different than it used to, as we have been living with family since the flooding of our home.  I really and truly have loved almost every minute of it, but it has certainly been challenging, at times, for all my "roommates."

One of the wonderful things about being back at home is that my sweet mother has given me complete "creative control."  in other words, I am free to style, decorate, rearrange, etc. the way I would in my own home.  this woman is so gracious to do this because, you know, it's not even my house!  but to be completely candid, I think she has probably enjoyed it a little, because who doesn't want a live-in decorator?

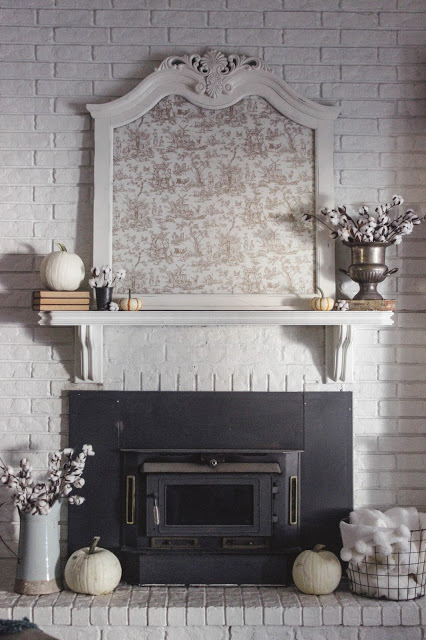
that said, it is interesting to decorate a different house in these new seasons.  I never dreamed that last fall and Christmas would be my last time to decorate for the holidays at the tiny white house.  however, at my parents', I have a great canvas to work with.  for instance, they have a mantle!  I know, I know—what a luxury, right?  but this is something we didn't have in our first home, so it's fun to create something centered around this.

But enough with all the words! without further ado, I'd like to share the 2016 {mini} fall tour with you!

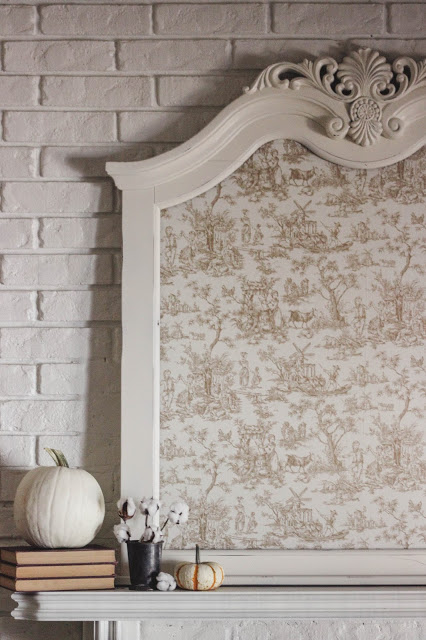
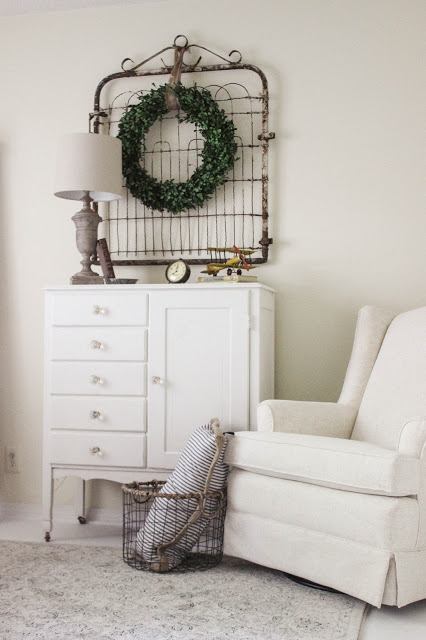
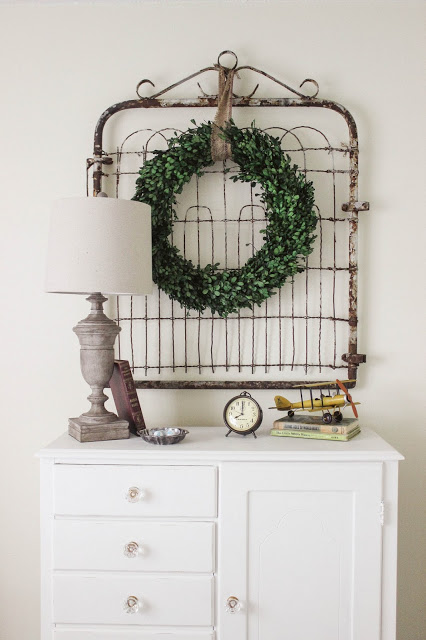
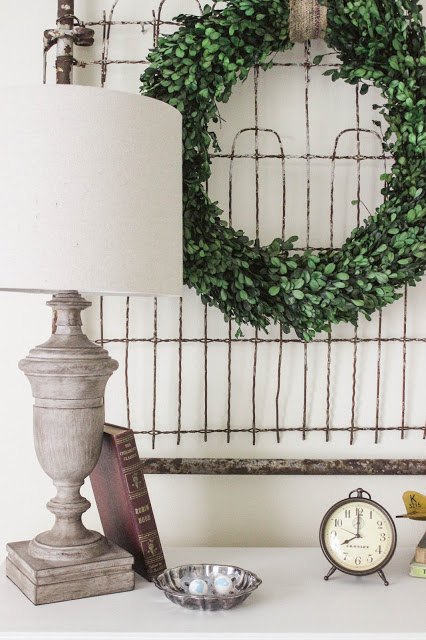
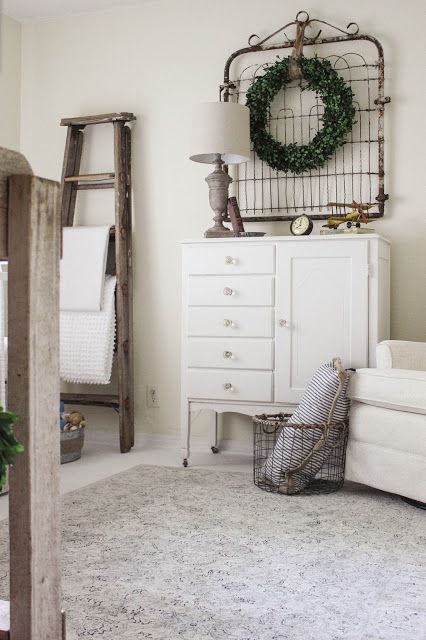
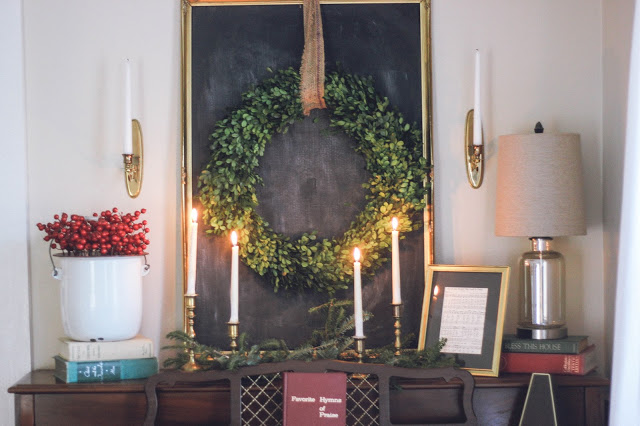
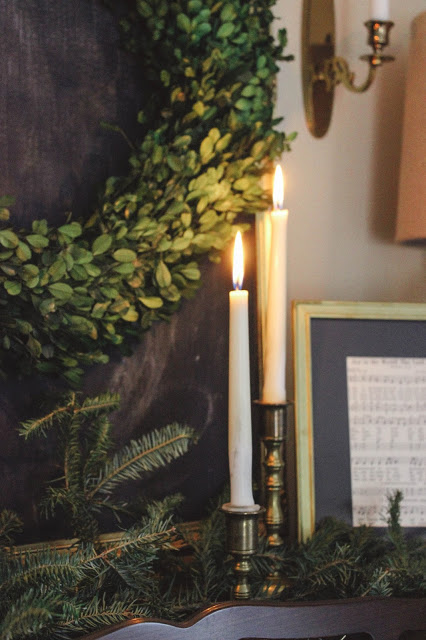
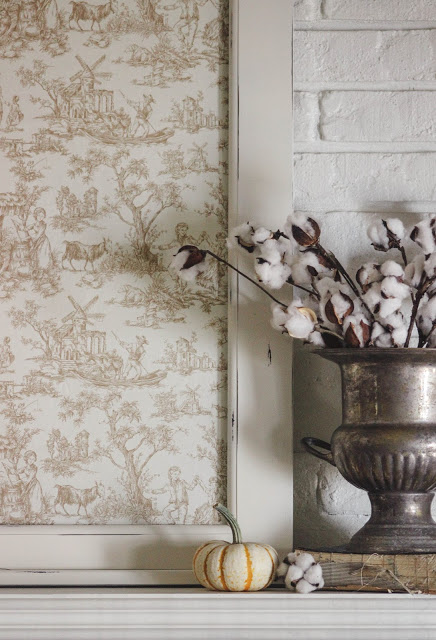
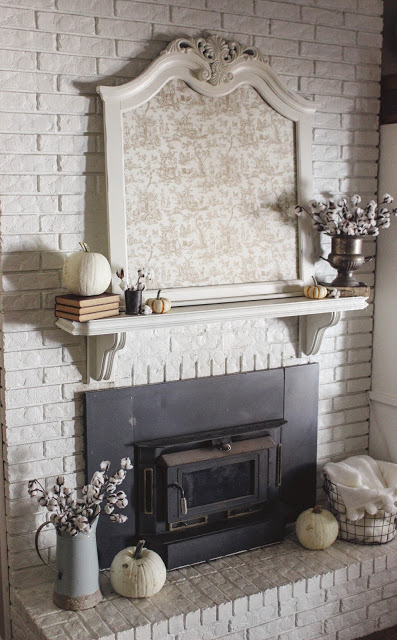
When I began to envision my fall decor, I knew I wanted to incorporate this oversized frame. I actually acquired this sometime earlier in the year. one afternoon, I was driving the little girl I nanny to her voice lesson. the church where her lessons took place was located near Good Will; so some days, if time allowed, we would stop by to see if they had any treasures for us. but, that's actually not where this came from. it was on the way to Good Will that I spotted a dumpster behind a store and what looked like a dresser sitting near it. so we took a detour and that's where I happened upon this piece! the dresser was beyond repair, but this frame was on the ground behind it. it used to frame a mirror, but I suppose the dresser + mirror fell and cracked so the store threw it out. obviously, they didn't realize they could paint it, staple some toile fabric in it, and place it on their mantle for fall decor, but that's neither here nor there.

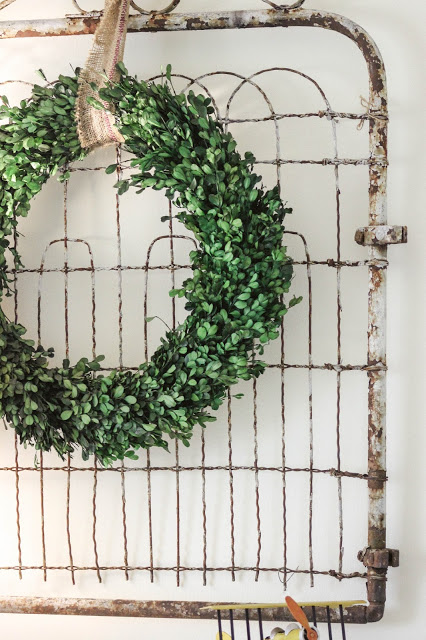
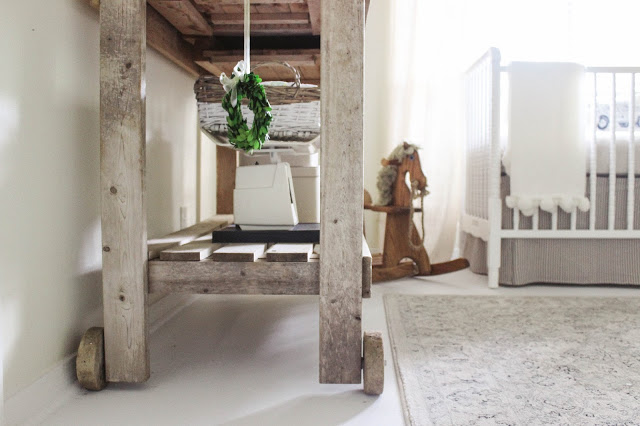
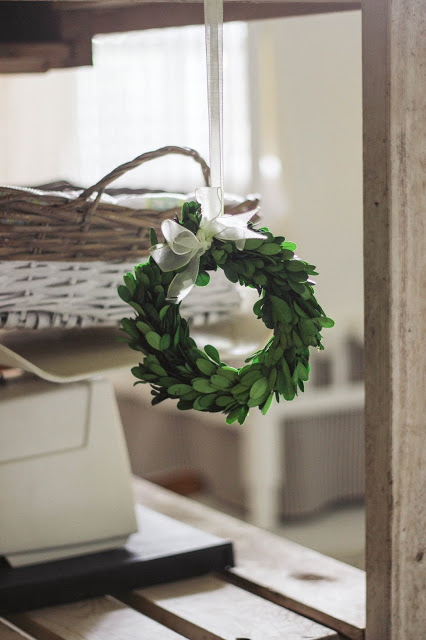
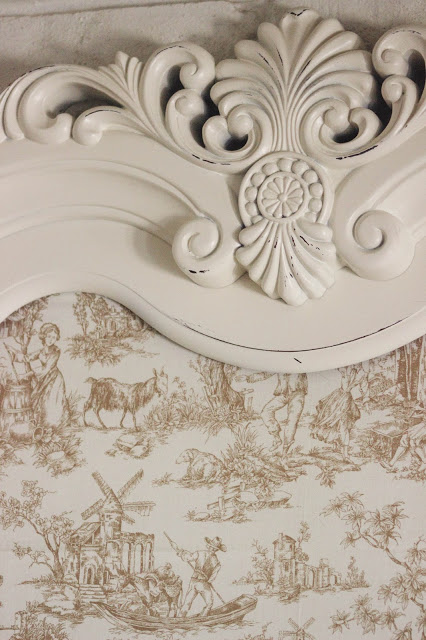
In the spring, we hung a boxwood wreath in the frame.  but when our baby arrived, that wreath moved to the nursery.  so the frame sat empty for some months, and then September rolled around.  I got the idea to frame some fabric and then remembered I had a couple yards of toile fabric I'd bought from Hobby Lobby to recover some pillows.  it had been sitting under our bed, folded up, in the very plastic bag it left the store in last fall, waiting for its time to shine.  with some assistance from my mother, we stretched + stapled this fabric in the frame.  it's a little simple, maybe even understated; but, to me, it definitely shines.  this is one of my favorite projects to date.  and the best part is it cost less than $10 to make!

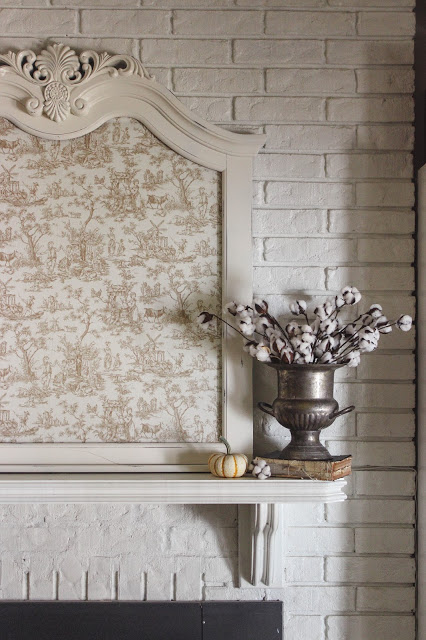
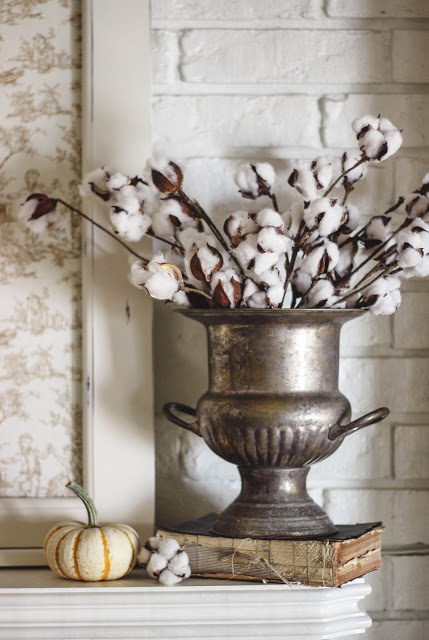
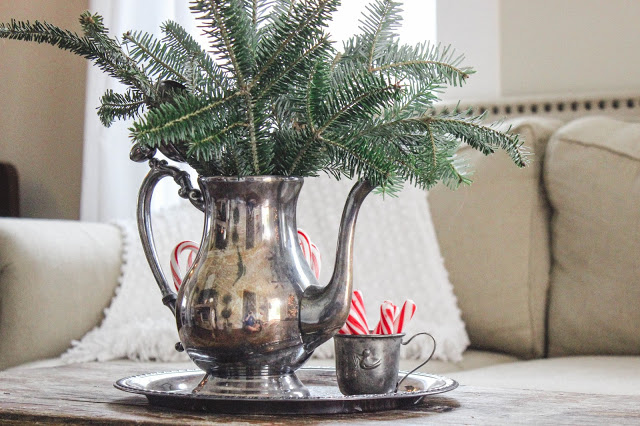
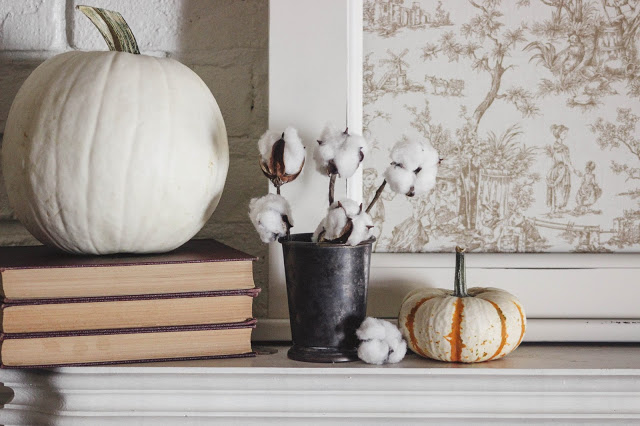
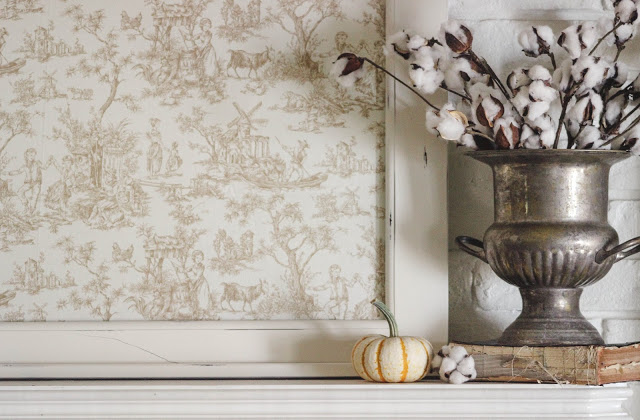
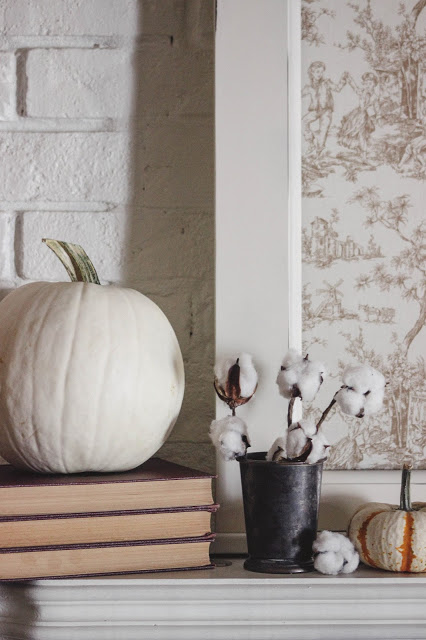
As I've mentioned before, silver is one of my favorite things to feature in my decor.  this antique silver ice bucket was a gift from my husband last Christmas.  clearly, he knows the way to my heart.  in the spring + summer, it was filled with hydrangeas.  for the fall season, it holds stems of cotton.

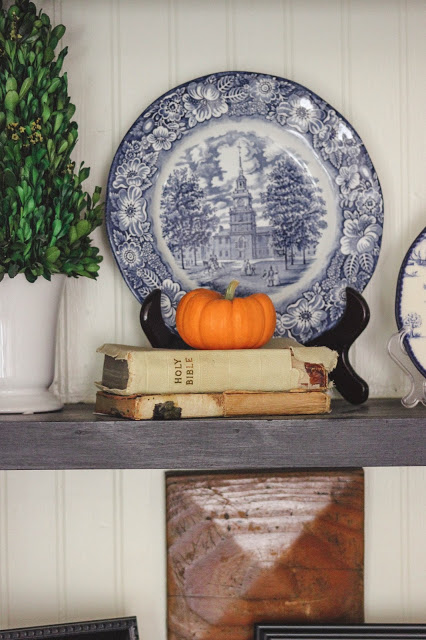
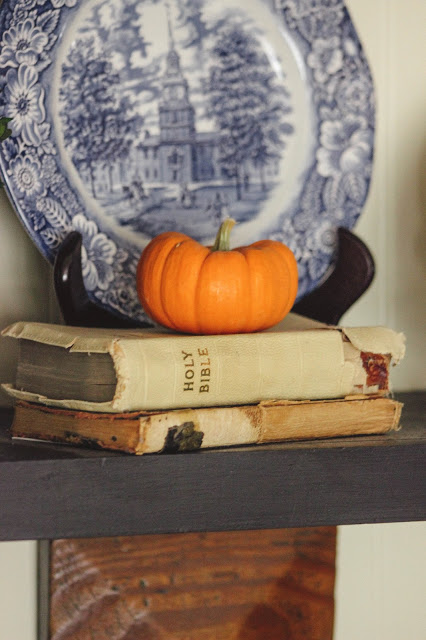
The ice bucket sits upon my great grandfather's Bible.  my mother has several Bibles that have been in our family for generations, and I'm jealous and I want them.  isn't that ironic?  to covet someone else's vintage Bible.  she says I can't have them [yet, anyway]; but since we're roommates, I am free to use them in my/our decor.

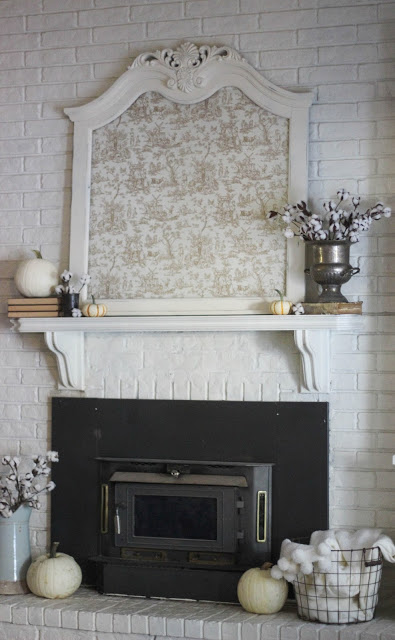
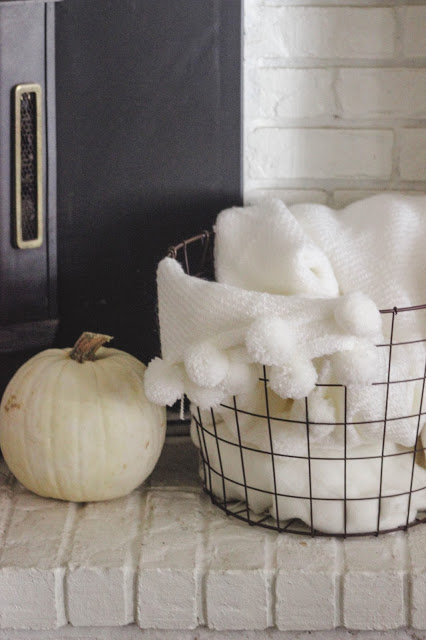
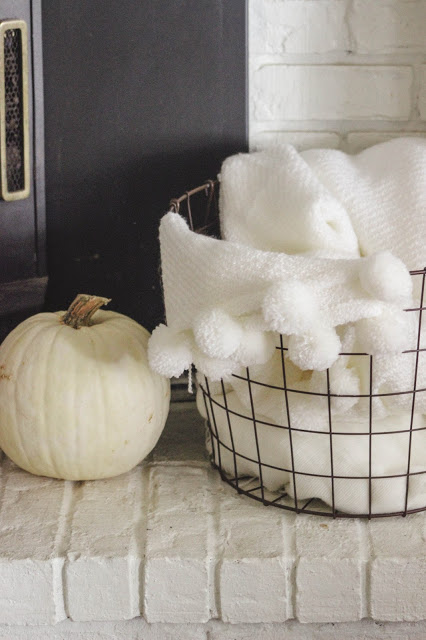
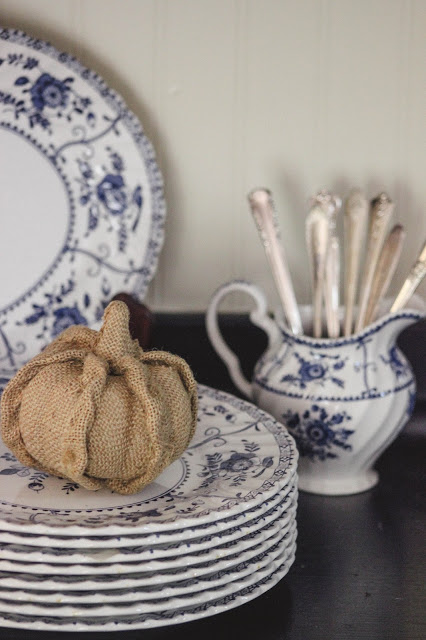
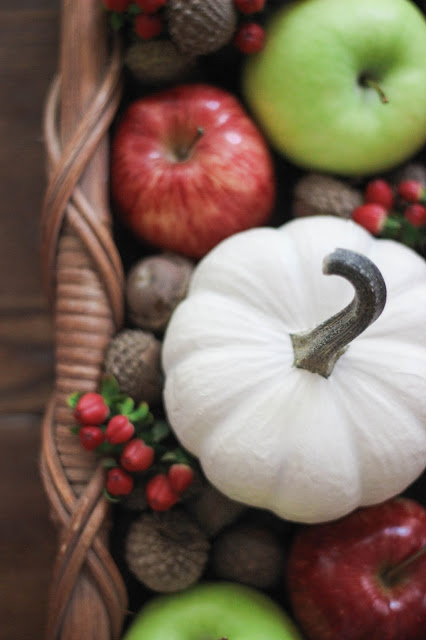
Of course, pumpkins are a staple when it comes to fall decor, and there's just something about white ones.  the oversized blue pitcher is a favorite of mine and adds a little color to this mostly neutral scene.

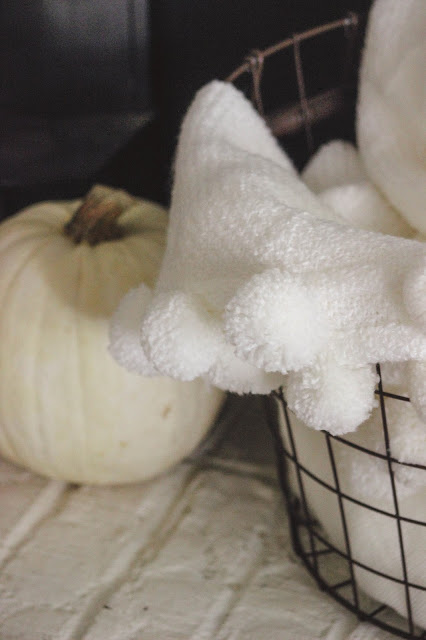
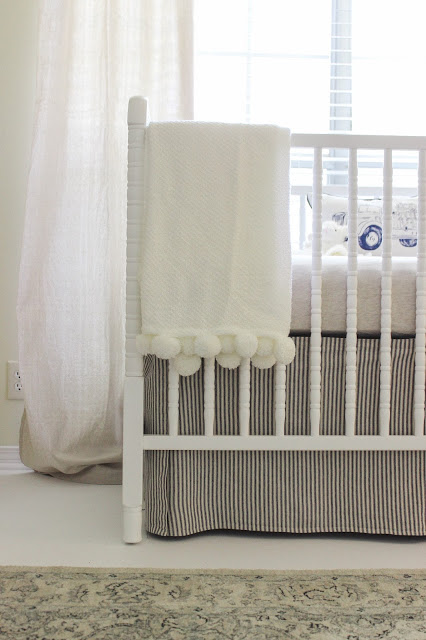
A wire basket filled with cozy blankets is a simple, yet decorative way to create storage and warmth—quite literally.

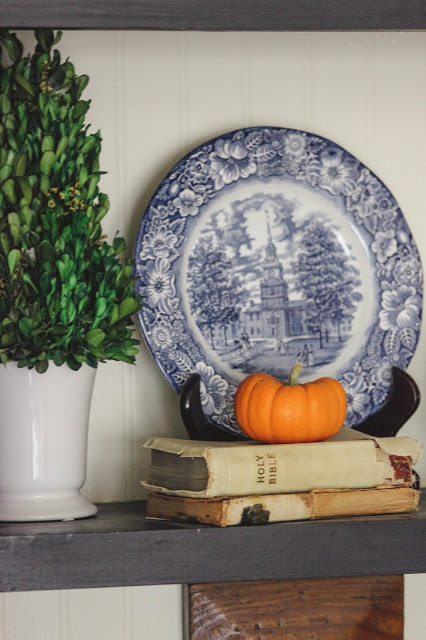
In the 2015 {mini} fall tour, I mention that simply placing pumpkins throughout your home adds a little touch of fall without much effort.  this lovely vignette is on the shelves of the hutch in the kitchen.  you already know I love blue + white dishes and greenery, throw in a pumpkin and I'm sold.  and would you look at that?  another old Bible I covet.

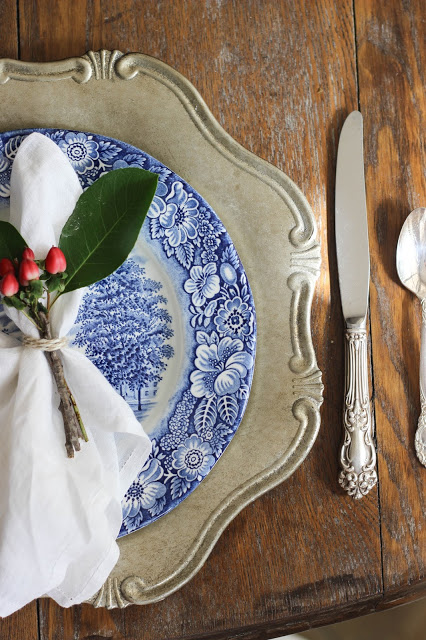
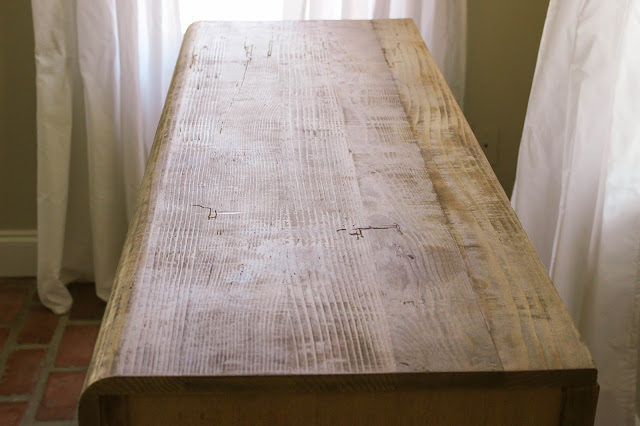
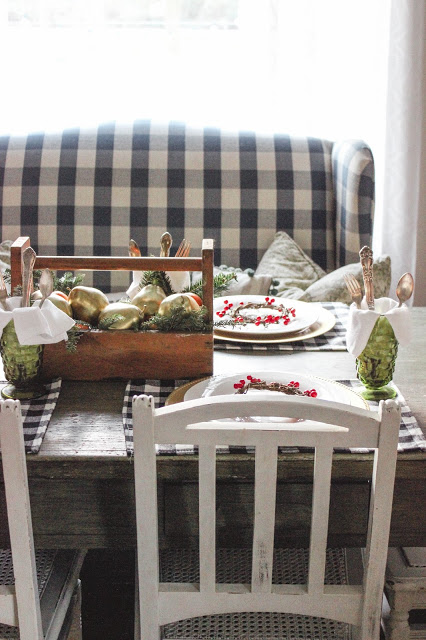
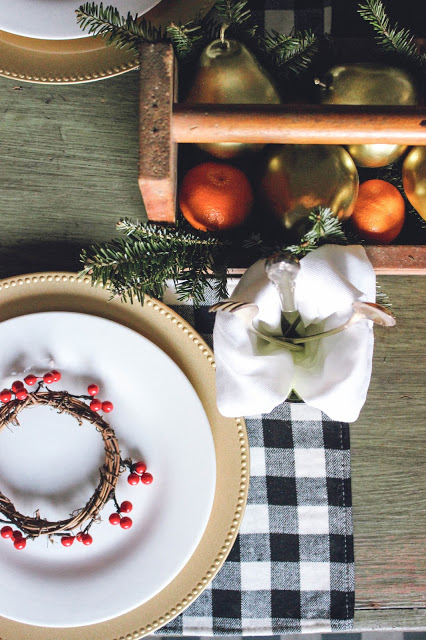
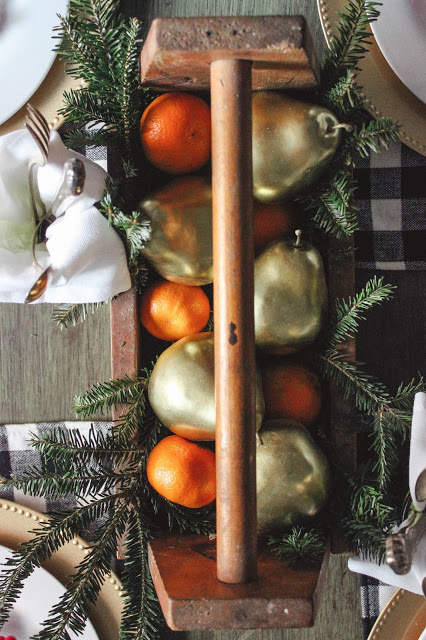
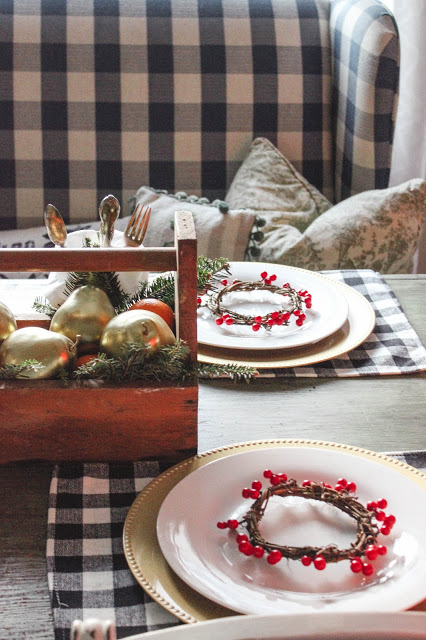
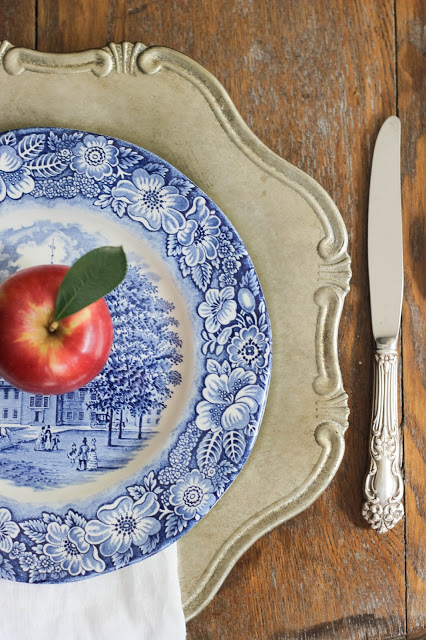
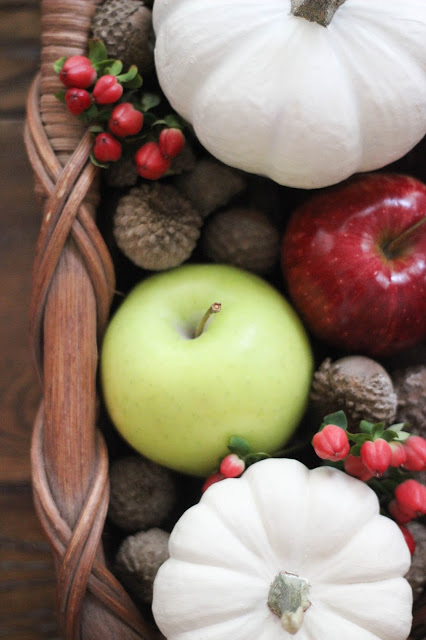
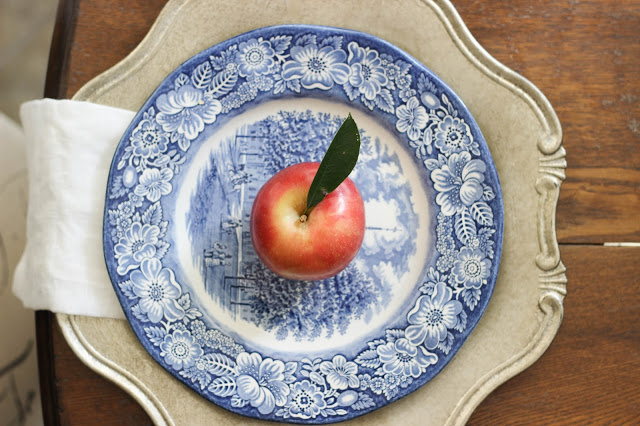
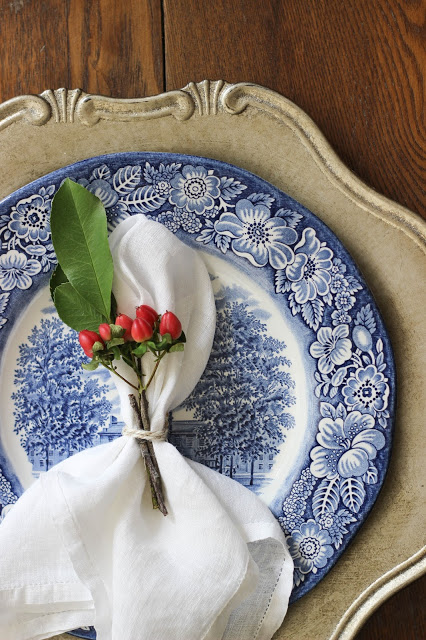
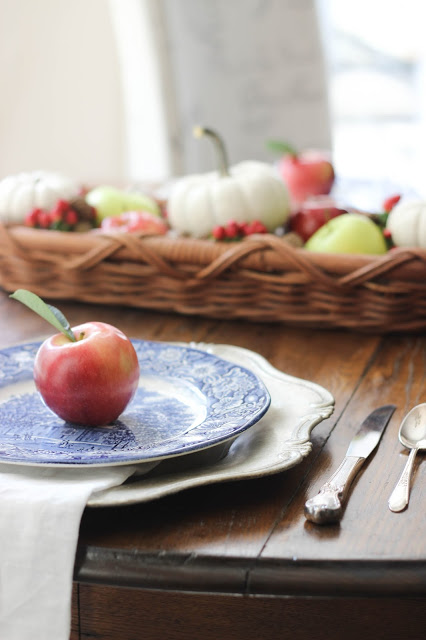
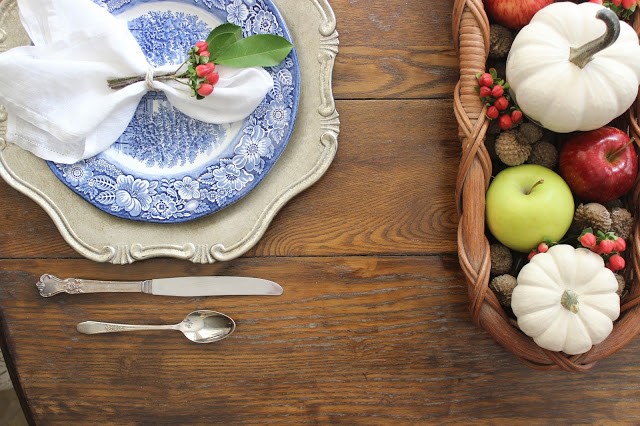
As pleased as I was with the way the mantle turned out, I couldn't help but feel as if the fall decor wasn't complete.  so, I decided to set the little drop-leaf table in the kitchen.  I used my favorite blue + white dishes, fresh apples + berries, and a few nuts I found in the backyard. 

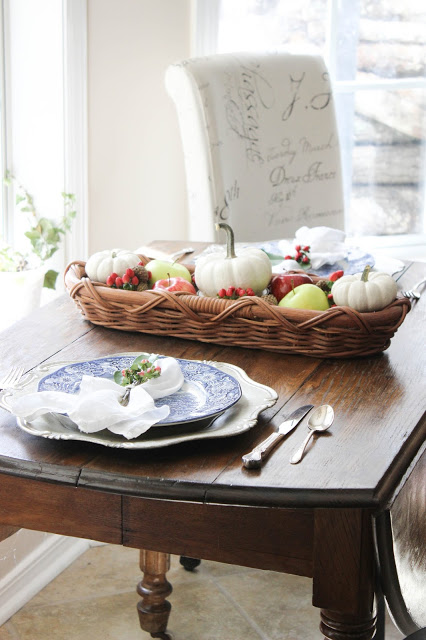
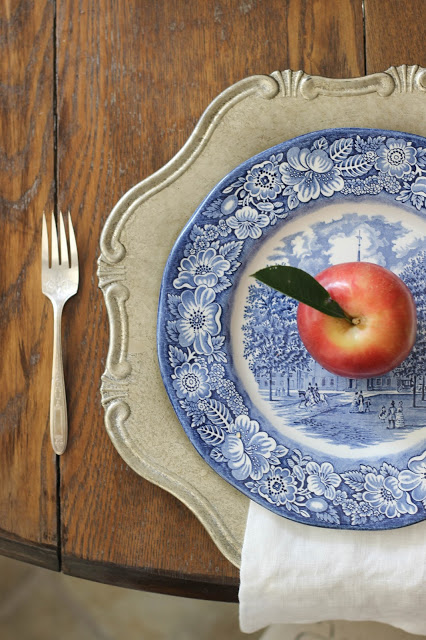
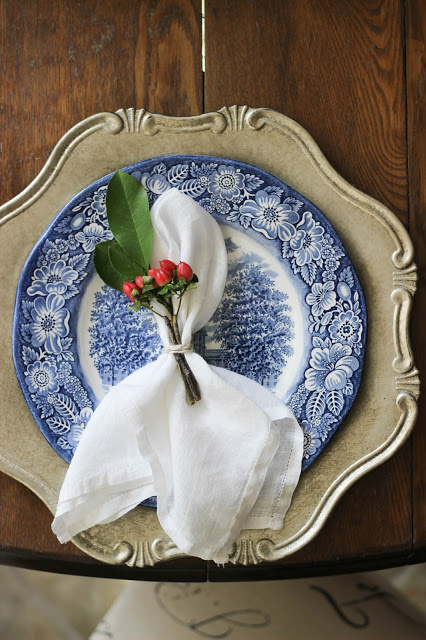
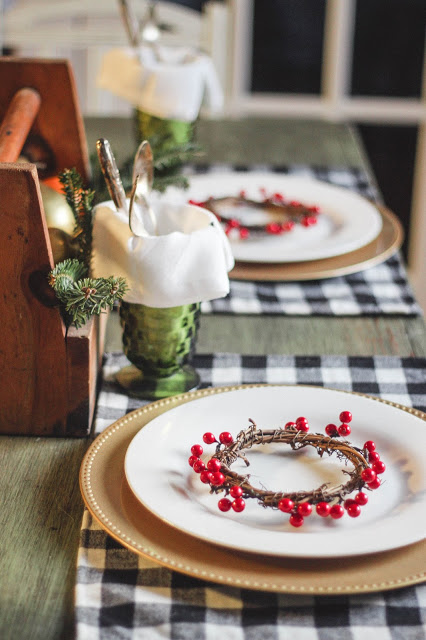
I was excited to use these chargers I scored at Home Goods when we were visiting family in Texas last Christmas.  I found them hidden under some bowls on a bottom shelf and just had to have them.  I did feel a little bad, though, because I'm pretty sure someone hid them there with the intention of coming back for them.  but you know, finders keepers, or whatever.

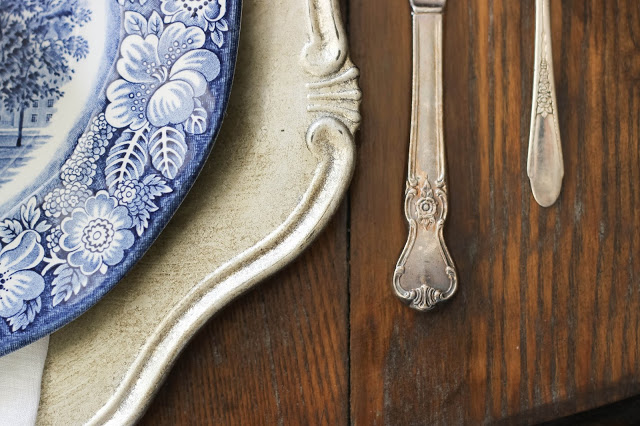
the mismatched flatware is part of my collection that I've gathered along the way, from antique stores to garage sales and junk shops.  the antique linen napkins were another Christmas gift from my husband.  cloth napkins are another one of my favorite things to collect.

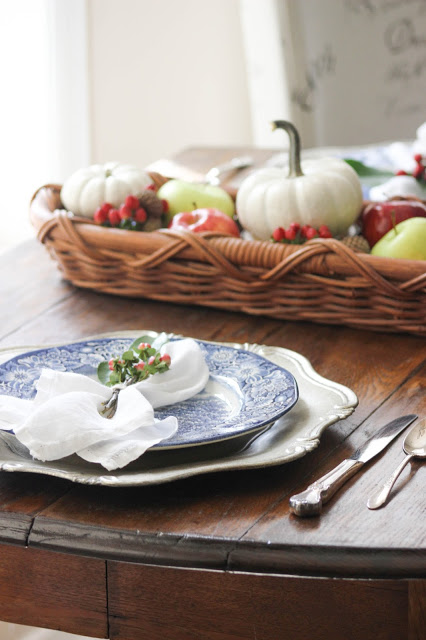
It's not much; but it's warm and inviting, and that's enough for me.

thanks for looking!  what do you think?  how do you decorate for fall?

life begins all over again when it gets crisp in the fall.
-F. Scott Fitzgerald

I'm so glad I live in a world where there are Octobers.
-Anne of Green Gables

diy crib mobile.

Recently on the blog, I shared a little about our baby's nursery.  one of the things specially created for his room was the crib mobile.  today, I want to share a tutorial with you on how to create this crib mobile.

materials needed:

  • embroidery hoop
  • fishing line
  • x-acto knife + scissors
  • tissue paper
  • embroidery needle(s)
  • sewing thread
  • book of your choice
  • paper + pencil
  • drill with a 1/16 bit

First, I read through Robin Hood looking for the best parts. you know what I mean... the meaningful parts with good words and strong imagery. the parts with the most adventure and love and excitement. this step is important because our baby will be able to read from the time he exits the womb, so I want him to have the best parts of the story floating over his sweet, little head. okay, so no. this step was more for myself. I wanted favorite parts of the story like... when Robin Hood + Little John meet, when he's reintroduced to Maid Marian, when he shoots his last arrow... you get the idea. the good stuff.

In case you haven't noticed from reading my blog, or if you know me personally, I'm a word girl.  my mother has always described me as wordy.  if I ever tell you a story or something that happened in a book or show, be prepared to stay awhile.  I really don't mean to be.  but there's just so many good words out there and I like a lot of them and I use a lot of them to say the things I say.

So, I skimmed through Robin Hood and picked out my favorite parts and marked them.  these would be our clouds.  next, I took the x-acto knife and begin to cut these pages out.

My little sister helped me with this project and she's a real artist.  we decided it would be best for aesthetics + symmetry + balance to have two small clouds and two large clouds. she sketched a stencil for our small cloud and I did one for the larger clouds.  we did this with a pencil and notebook paper and sketched until we came up with a cloud shape we liked.

then, I took the clouds and placed them on the page, over the words I wanted to be seen.  because I'm so wordy, this part was a little sad + hard because I couldn't fit the entire quotation as these are little bitty clouds.  I would've loved to have had the full excerpts I had chosen, but that just wasn't doable.  [one way to make this work would be to mat + frame the excerpts, rather than cutting them into the shape of a cloud.  that's one of my favorite, super easy crafts that makes for beautiful, yet different framed art.  I have a few of these type of framed pieces in my home, ranging from hymns to poetry to stories.]

I traced my little clouds over the book pages and then cut them out with scissors.  one thing to keep in mind when tracing the clouds is this: after you trace your cloud, you'll need to flip your cloud stencil over to trace your next cloud, so that it will match up when it's stitched together.  this is one of the easier parts of this project.

After the clouds are all cut out, it's time to sew!  we took little pieces of tissue paper, crumpled them up, and flattened them back out.  this is what we stuffed our little clouds with.  I wanted them to have some volume and this was the best I could come up with for stuffing.  next, get out your needle and thread and get ready for the fun part!  and by fun, I mean most tedious, time-consuming part.  once you thread your needle, start stitching your clouds together.  I would sew the cloud about halfway around and then begin stuffing it with bits of tissue paper.  this part really doesn't take too long, it just takes the most attention.

I took the inner hoop of the embroidery hoop [the one without the hardware], white-washed it, let it dry, and then drilled holes.  actually, I let my husband do that step.  I never want him to feel left out of my projects, so I try to always find something for him to do to be a part.  that last line should actually read: I always need help with at least one part of my projects, so I beg him to help me.

he took his handy drill and used a 1/16th drill bit and drilled four holes, one across from the other, evenly around.  then, I took two pieces of fishing line, probably about two feet in length and inserted them into the holes on the embroidery hoop.  they crossed over each other and I gathered the four strands together and tied a knot.  [this sounds confusing, but there are photos below that will make this step more clear]  after this, I cut a shorter piece of fishing line, threaded that through the embroidery needle and into the top of the cloud, and tied a knot.  I took this piece of fishing line sewn onto my cloud and threaded that through the hole on the embroidery hoop and tied a knot [several times so it wouldn't slip through].  I repeated this step until all four clouds were fastened to the hoop.  I didn't measure the exact length of fishing line the clouds would hang from.  I eyeballed it and purposely made them to hang at different lengths.  I did intentionally hang the two larger clouds across from each other on the hoop and the smaller across from each other to create balance + symmetry.

my husband placed a screw hook in the ceiling, and after cutting one more piece of fishing line about two feet long, I looped it under the knot that held the four strands together.  then we hung it from the ceiling.

I wrote this post just weeks before our baby arrived.  he's here now!  even though he's not sleeping in his crib yet, he took a little nap in it one day and I couldn't resist snapping a photo of him under his sweet little mobile.

thanks for reading + hope you enjoyed!

the nursery.

On August 29th, 2015, my husband and I found out we were expecting our first baby. we were stunned and so unbelievably excited. it didn't seem real for the first few months [still doesn't sometimes], but eventually it began to sink in as we began to prepare for this sweet baby and all the changes that would take place.

One of the things I was most excited about was creating a nursery. I had a vision in mind of what I would like for a boy or a girl. it wasn't a one-size-fits-all, gender neutral nursery; but it would have been very similar, regardless of the gender. I wanted simple, classic, quiet.

The day before thanksgiving, we found out we were having a boy! I was ecstatic. I've always wanted an older brother, so I always dreamed of having a boy first. this was literally a dream come true.

As excited as I was about decorating a nursery, I didn't really get started on it until March. I'm sure this surprised some; it surprised me a little. but I didn't want to jump the gun; plus, we had lots of furniture and things to shift around to make room for baby.

The day before my first baby shower, I finished the nursery. mostly, anyhow. several of my precious friends came in town for the shower and that gave me the motivation I needed to really wrap things up in the baby's room. I'd been dreaming about what I wanted our nursery to look like for months, maybe even years, and slowly gathering + collecting these items the previous eight months.

so one Friday morning, my parents came over to help bring all my dreams to life. my dad hung the curtains my mom had sewn for the room, on the curtain rod he painted the perfect shade of gold that I had searched months for. a beautiful, antique garden gate hung on the wall over the buffet [now a changing table] and a boxwood wreath hung over that, like a bow on top of a gift. my artist little sister created priceless artwork that decorated the walls, sweet watercolor paintings of baby animals. the buffet and armoire I spent hours, even weeks, restoring and refinishing looked just like they belonged, just like I envisioned. the crib that my husband so lovingly assembled sat in front of the one window in the bedroom, framing it perfectly. the crib skirt our baby's great grandmother made rested around it, gently flowing onto the carpet.

it. was. perfect. it was my new favorite room in the house. I loved walking in there. I found any excuse I could to do it. it was everything I dreamed it would be and more. 

and then on March 9th, less than a week later, our home flooded. this crazy, unexpected rain rolled into town and flooded homes, streets, businesses, churches, everything. it was devastating. and the tiny white house was no more.

So, here we were, eight months pregnant and temporarily displaced. my gracious parents have taken us in for the time being. and we had to set up a nursery. again. this time wasn't quite as fun or exciting. it was marked with tears and sadness and bitterness and even a little anger. it actually took me a little while to get around to doing anything because I had already done it all and set up this perfect [to me] nursery and then it was washed all away, along with the rest of our home.

but my family was so kind and gentle and patient and helped me to slowly pull myself together and recreate this nursery for our baby. and you know what? it's even better than I dreamed it'd be.

it is now complete, minus the little boy who will one day make his home here.

The beloved buffet-turned-changing-table that has been in the family for years did not make it through the flood. talk about heartbreaking. I cried many tears over this. then we decided to improvise with our potting bench, which used to serve as our entertainment center. this was the first piece of furniture I ever bought for our home. before we were married, I snagged it at a garage sale for forty bucks. it's one of my favorite pieces. I'm sad that the buffet couldn't weather the storm, but I love that this piece is getting use again for yet another unconventional purpose.

My sister + I created this little mobile to hang over the crib. I wanted something sweet and serene and, frankly, not stupid to use as our crib mobile. so I came up with this idea of little floating clouds made from book pages. I cut out some of my favorite excerpts from Robin Hood and used them for my clouds. you can find a diy crib mobile tutorial here.

thanks for taking a look! hope you enjoyed.

"even the sparrow has found a home, and the swallow a nest for herself, where she may have her young—a place near your altar, O Lord Almighty."
Psalm 84:3


times are changing! read about the nursery pt. ii here and the nursery pt. iii here.

the buffet makeover.

let me start by saying I am very pleased with the outcome of this project, but I need to be honest and tell you that removing veneer is not for the faint of heart. I had zero experience, as this was my first time to do so. and for whatever reason, I thought it would be a single, thin layer of veneer and that would be all. this was not the case. there was the top layer of veneer, another layer of thin cheap wood [I'm no wood expert, but I'd venture to say it was particle board or low grade plywood], bits of glue, and then I got to the real wood.

I also made a few mistakes. as I was pulling veneer off of the sides of the buffet, I felt some thin wood so I yanked at it, thinking it was a layer of the cheap wood over the real wood. this was also not the case. that was the actual side of the cabinet and I tore it off. luckily, my handy husband helped me out and we got some plywood, cut it to size, and secured it into place. this was probably a happy accident because this piece has seen a lot of life and needed a few nips and tucks.

before I began this project, I did a little research on Pinterest to learn how to remove veneer. my original plan was to strip the veneer and paint this piece white. you know, my go-to. but I plan to use it in our baby's nursery and there will already be a lot of white in there, so I decided to try my hand at antiquing wax and give it a stained look. I've never done this before either, so this project was an all around experiment. fortunately, it turned out well.

the materials I used in this project are listed below:

  • gloves [this is probably common sense and a given when it comes to any type of woodworking project. I am an amateur, though, so it never even crossed my mind until I had sufficiently cut and bandaged multiple fingers.] 
  • joint knife
  • damp towel
  • clothes iron
  • orbital sander
  • antiquing wax

some pieces were already chipping and curling up. those were easy to peel off or pop off using the joint knife. and then there were other pieces...

for really stubborn sections of veneer, I found that laying a damp towel down and ironing over hard-to-remove pieces helped to reactivate the glue and, in turn, loosen up the veneer. then I used the joint knife to scrape and lift away the damp wood. our little iron has never seen so much action.

another thing I was excited to try in this project was this antiquing wax. it's by Miss Mustard Seed, who is one of my favorite designers. I love her work, and now I know I love her wax. maybe I'll try her milk paint next!

this project took longer than I anticipated. it probably could have been completed in a weekend or two, if I had worked nonstop. I, however, took my sweet time and many, many breaks. so it took me about six-ish weeks. not my best record, but it's done now and I'm happy with it.

ready to see the finished product? here it is!

I chose to keep the original hardware. I love the aged look of it. besides a few new screws, the handles + hinges are original to the piece.

here's a close-up of the top after much sanding and applying the antiquing wax. I don't usually love stained things, but I love this finish. my husband's grandfather, who helped replace the sides, asked me if I planned on filling in the gaps + worm holes. he couldn't believe it when I told him I planned to keep it just the way it was. I think every scratch, dent, and worm hole adds a little character. 

the missing drawers that used to be in the center of the buffet were broken and misplaced before I got my hands on this piece. I hate that, but I plan to have some wood cut and placed in the middle to make shelves and I'll find some baskets to fill them and create more storage.

this lovely piece of furniture once was a buffet in my husband's great, great grandmother's home, then lived hidden away in an old barn for years + years, and now is going to serve as a changing table + additional storage in our first baby's nursery.

maybe once I finish up the nursery and style this piece, I'll get around to sharing it with you. but don't hold your breath... it could be another six weeks or so.

a {mini} Christmas tour.

I can't believe Christmas is already here! every year I feel like it comes and goes so quickly. it makes me sad, too, because Christmastime is one of my favorite times and my favorite holiday, by far. with it comes the best traditions, best sights, best smells... it really is the most wonderful time of the year. so it's pretty much a given that it's my favorite season to decorate for. 

I love having a live tree inside the house—that's one of my favorite smells. and I love having greenery pretty much everywhere. I have greenery [mostly faux] displayed in my decor throughout the year, but I love having real, smelly greenery in the house during Christmas. this year when we went to get our tree, I asked the Christmas tree lady if I could keep the branches they cut off the bottom of the tree. she smiled real big and said, "honey, you can take all the branches you want" and pointed me to a massive pile of branches that had accumulated from all the trees being trimmed. I felt like I was in heaven. "grab a handful! as many as you can!" I shouted to my husband. he's such a trooper and took about three or four loads to his truck. now they fill pitchers, teapots, milk jugs, you name it all throughout our home. I'll be sad to see them go.

the good, prompt, professional bloggers share their Christmas home tours well before Christmas, perhaps so that you'll be able to glean some inspiration and recreate some of their ideas. but I am none of these things, so here are my ideas and inspiration,  just in time for Christmas. I hope you enjoy!

in the past year, I've discovered my love for silver, especially old, tarnished silver. my favorite pieces of silver I've collected so far are teapots, mint julep cups, and platters. I just love its classic, understated yet elegant look.

in my {mini} fall tour, I shared about how we use our piano as a mock mantle. so this is where most of our Christmas decor is placed. there are little touches of it all throughout the house, but this is the main event.

the thing you have to know about me is I'm the world's cheapest. I think I get this from my parents. this works well for me for a few reasons: 

  1. I don't have a huge budget, plus I don't want to spend much money
  2. I love the thrill of the hunt

most of the pieces I use to decorate come from secondhand stores, garage sales, dollar stores, or the trash. on the other hand, there are places that don't fall into the previous category but don't break the bank either and I have been known to get myself into spending trouble there. my favorites are TJ Maxx, HomeGoods, and Stein Mart.

see that cute, little enamel bucket full of berries? I found it one day while antiquing with friends. it was like seven bucks. I was SO excited about it. I didn't know what I was going to do with it at the time, but I knew I needed it and it would come in handy one day. a few weeks later, my uncle was in town visiting and had stopped by my house to drop off some furniture. "do you know what that is?" he asked. "umm... no. but it's cute, huh?" I replied. he smiled and then proceeded to inform me that it was a chamber pot. of course when he told me this, I had it sitting on my kitchen table. we laughed and laughed. I still think it's the cutest little chamber pot I've ever seen.

since we don't have a chimney to carefully hang our stockings by, we hang them on the potting bench that is our entertainment center. it's no fireplace, but it works.

in our kitchen, I set up a little hot chocolate bar that hasn't gotten much use except from myself.

and now for the biggest Christmas decoration of them all: the tree. this is our second year to put our tree in an oversized galvanized tub and I'm not tired of it yet. this is our third year to have lights only on our tree, as we own about seven ornaments. I keep meaning to start collecting those, but here we are. maybe I'll get around to it this year and by next, we'll have enough to decorate it! we'll see... because honestly, I love the simplicity of a tree and just lights.

I set my table, too, but it got about as much attention as the hot chocolate bar.

when I began to photograph my tablescape, I realized the majority of the items on my table came from the Dollar Tree. the gold chargers, the white dinner plates, the miniature holly wreaths, and the gold pears in the centerpiece were all purchased there. the placemats I found in the dollar section at Target—jackpot, I know. the green glasses, a garage sale. the antique toolbox, my husband's grandfather. and the cuties, Walmart's produce section.

I found this precious red + white garland at TJ Maxx one day and decided to hang it on my dining room window, along with two other garlands. the jingle bell garland I made with a little twine + dollar store jingle bells. I purchased the greenery garland a few years ago at Michael's.

and here's a few shots of our hazardous front porch, that started caving in two weeks ago.

and there you have it! this is what Christmas at the tiny white house looks like.

merry, merry Christmas to you + yours.

but the angel said to them, "do not be afraid. I bring you good news of great joy that will be for all people. today in the town of David, a Savior has been born to you; he is Christ the Lord. this will be a sign to you: you will find a baby wrapped in cloths and lying in a manger."
Luke 2:10-12


"now thanks be to God for this indescribable gift, which is precious beyond words!"
2 Corinthians 9:15